I decided to change DNS in Win10 to a new DNS provider to have more privacy. Here is a quick post on the how and why I am doing this.
The main reason for changing my DNS is to use a more private DNS provider. While I am not really all that worried about who knows what sites I visit. I do like to keep things more private if there is an option available. So I decided to switch to Cloudflare’s DNS which I saw being touted as the internets fastest, Privacy-first consumer DNS service. I put a link to the cloudflare blog below.
Why change my DNS servers?
When your device reaches out to resolve an internet name to an IP address, the DNS provider that resolves this knows the identity of the site you visit. I was currently using Google’s DNS on my PC. But decided on switching to Cloudflares 1.1.1.1 to try it out. If you want to read the details of Cloudflares DNS 1.1.1.1 you can check out this post from the Cloudflare blog HERE It has some great information and detail. I liked that they mention they do not store client IP addresses or any information in their logs that identify end users. They also stated all logs collected by the public resolver will be deleted within 24 hours.
How to change the DNS servers.
Here are the steps on how to change your DNS servers in Windows 10. For this example I am just going to change it from the control panel.
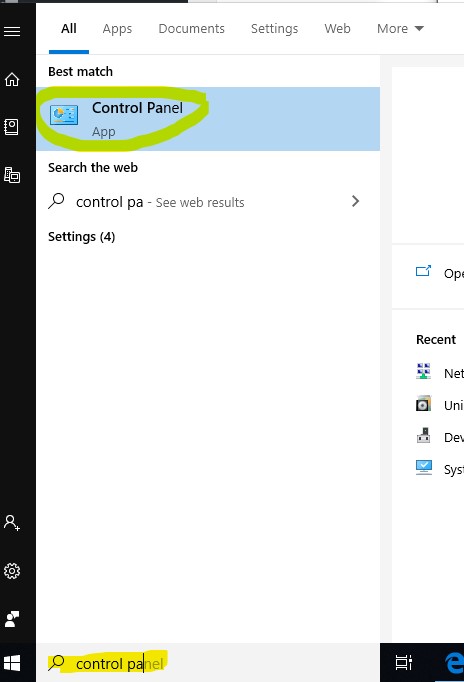
Step 1. Open Control Panel (Click the windows key, then start typing “control panel” and the option should pop up) Then click on Control Panel to open it.
Step 2. Click on “Network and Internet”
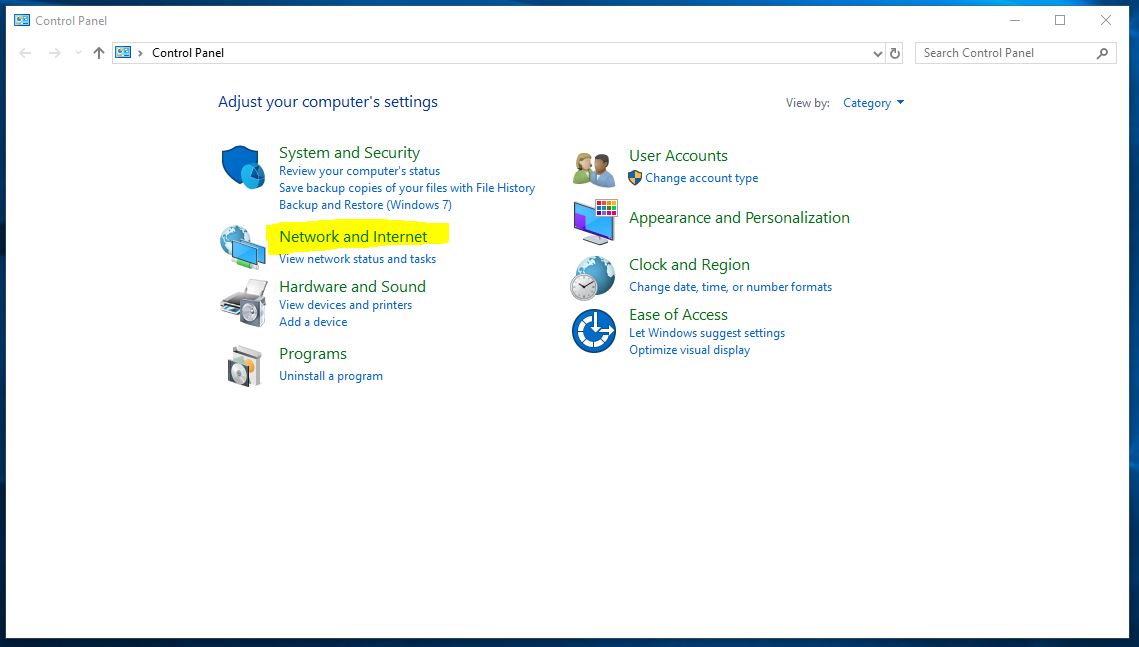
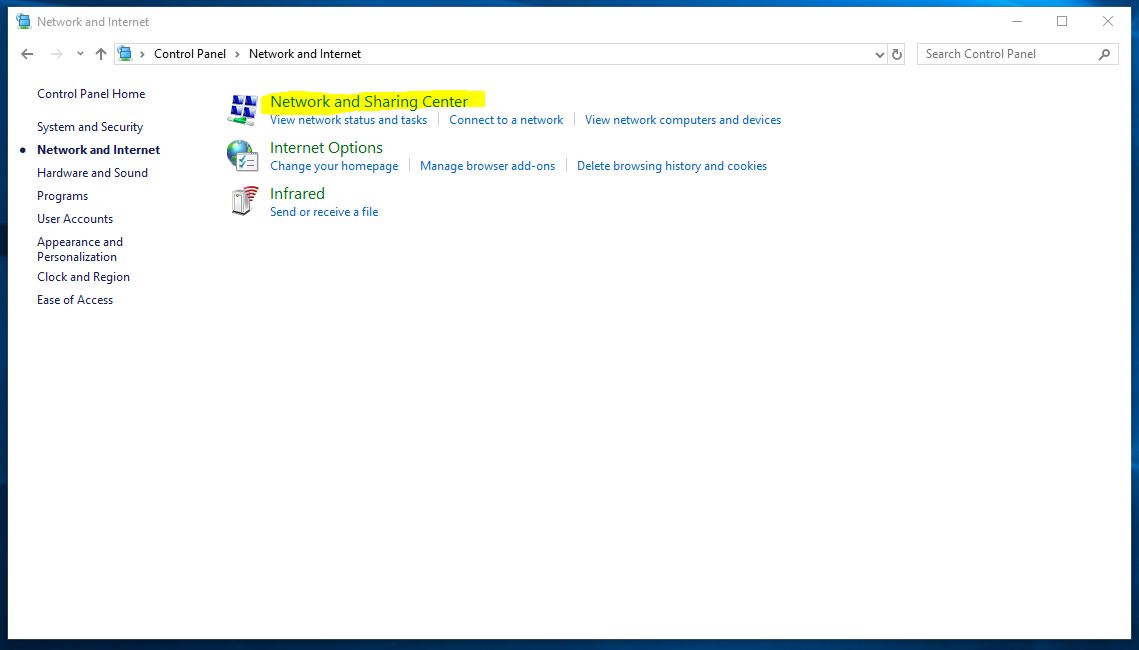
Step 3. Click on “Network and Sharing Center”
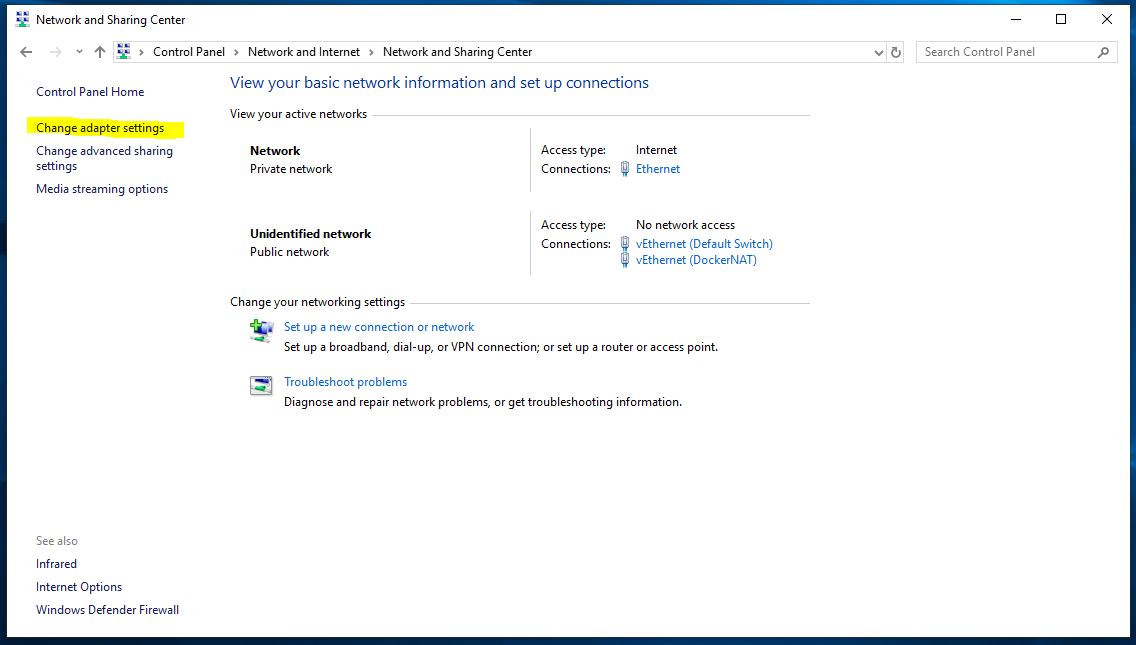
Step 4. Click on Change Adapter Settings.
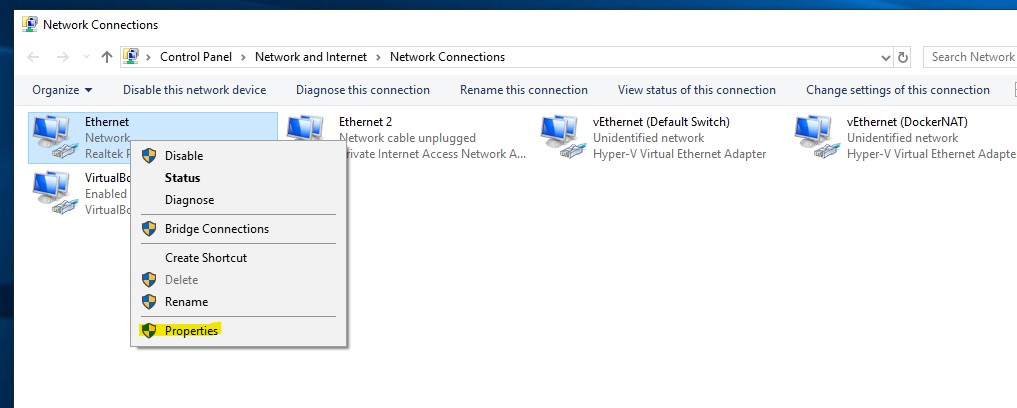
Step 5. Right click on the adapter you are using for Internet access. Then click on properties from the drop down menu.
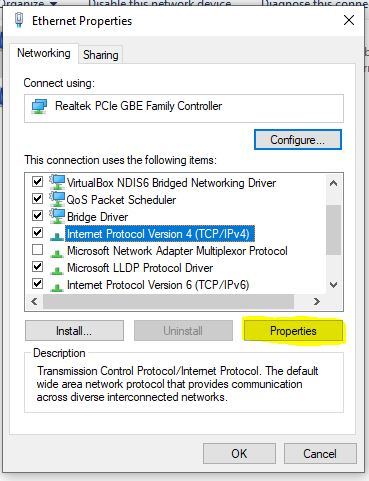
Step 6. Select Internet Protocol Version 4 (TCP/IPv4) and click properties.
Step 7. Add your DNS addresses you would like to use in the boxes highlighted below. For me I am using cloudflares DNS 1.1.1.1 and 1.0.0.1
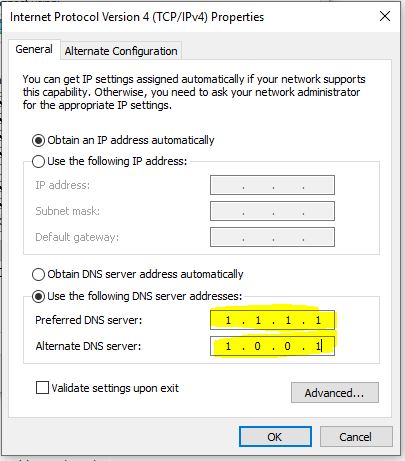
Step 8 Click the OK box.
Completed
Thats it, my DNS changes have been made. I will update this post if I run into any issues and change back to google or my default ISP addresses.
Other DNS Providers and resolution speed comparison
Here are a few other DNS providers and their speed when I checked them from my current location. (They were checked in Linux using the dig command and the query time is posted below next to each DNS provider (The lower the time the better)) Command example: dig @1.1.1.1 myrandomtechblog.com
Cloudflare 1.1.1.1/1.0.0.1 19ms
Google 8.8.8.8/8.8.4.4 31ms
OpenDNS 208.67.222.222 / 208.67.220.220 45ms
Verisign 64.6.64.6 / 64.6.65.6 141ms
Frontier 74.40.74.40 / 74.40.74.41 (my ISP I am currently using) 9ms

In conclusion it is not a surprise that my ISP I was currently using was the fastest. But, I am still going to stick with Cloudflare for now as it was the second fastest.
Hope you found this helpful, thanks for stopping by the blog.
If you would like to see how to change your MTU size in windows, you can see this post HERE.