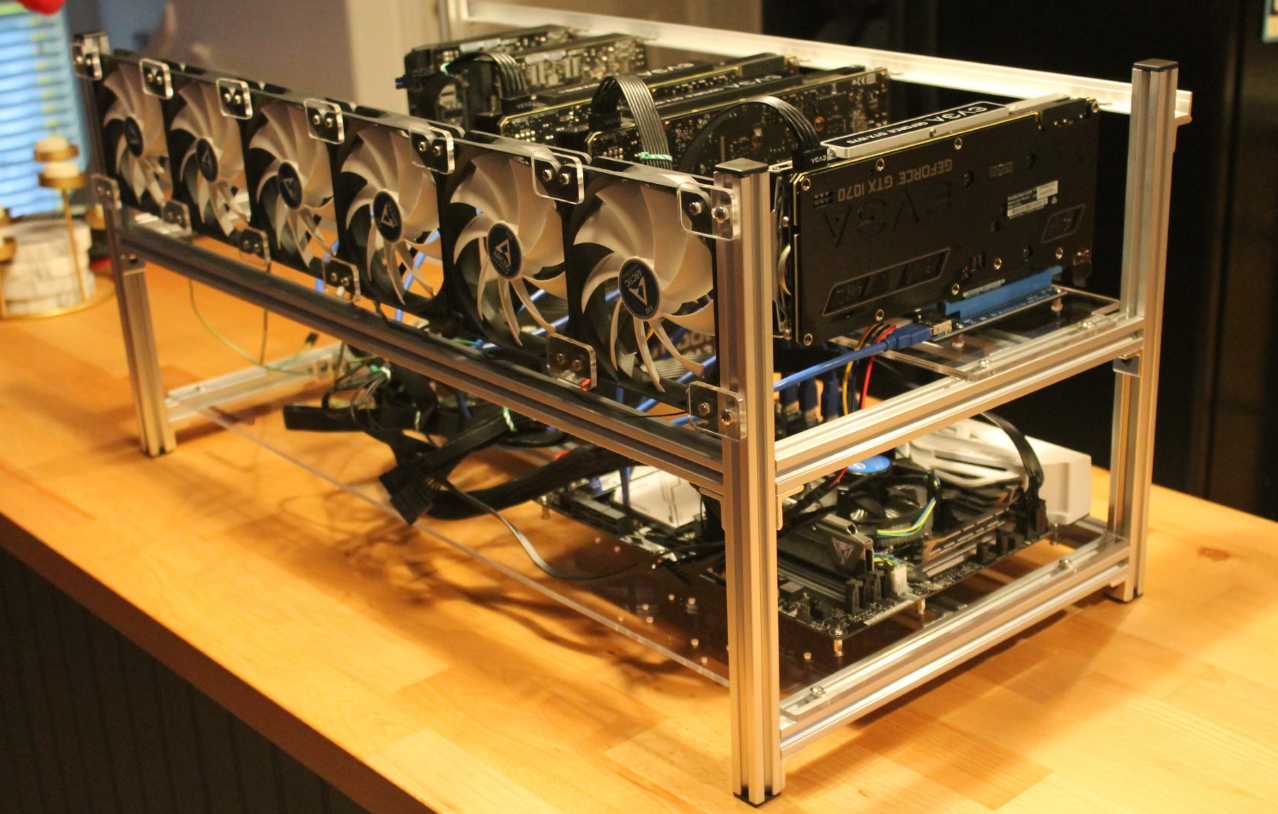
AAAwave 8 GPU frame assembly :
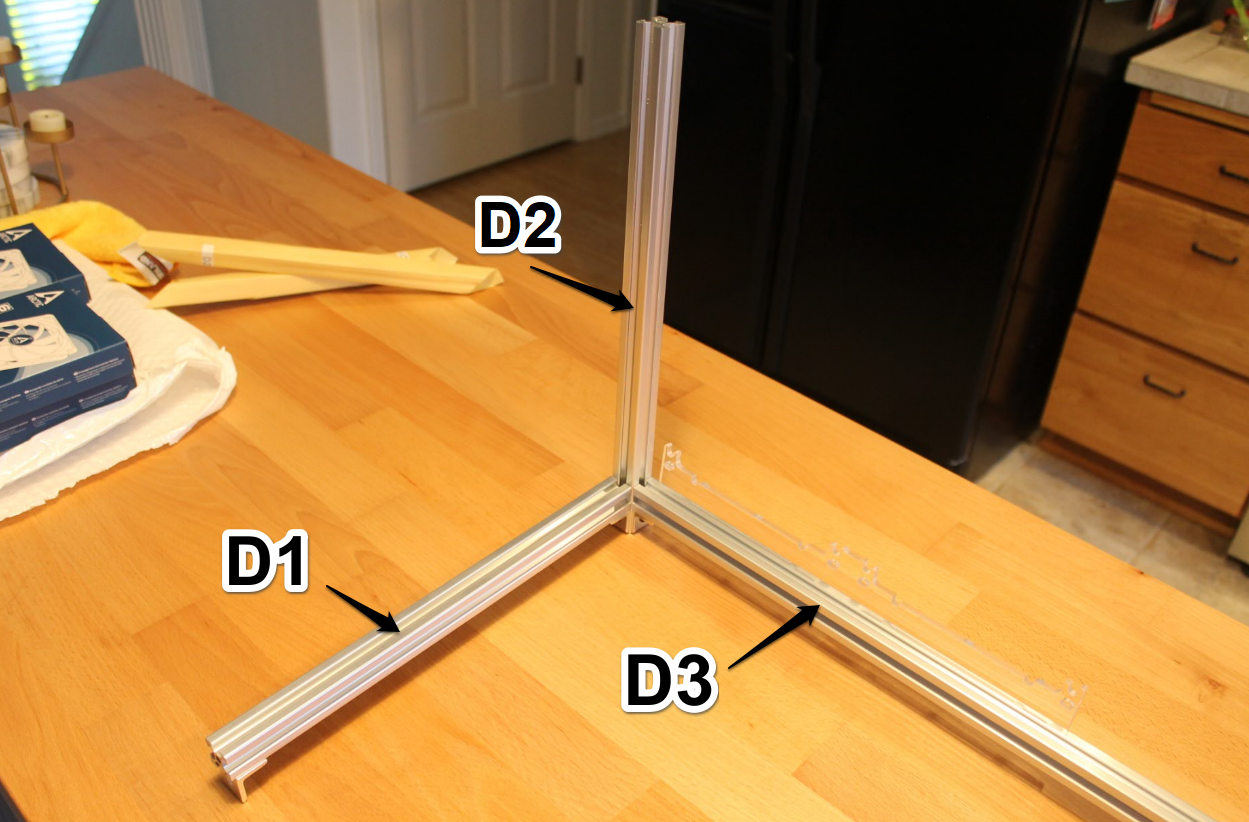
While AAAwave included instructions, I used them mainly as a rough guideline. So what I did might not match up 100% with the instructions. The first figure in the instructions showed you connecting D2 to D3 and I think that figure is wrong. It should be D2 to D1. Hence why I just started using it as a guideline. The included instructions were helpful though. Also I stripped out the included hex wrench. You might want to make sure you have a 2.5mm one handy.
I started by adding the square nuts and screws to all the angle brackets. Like this.
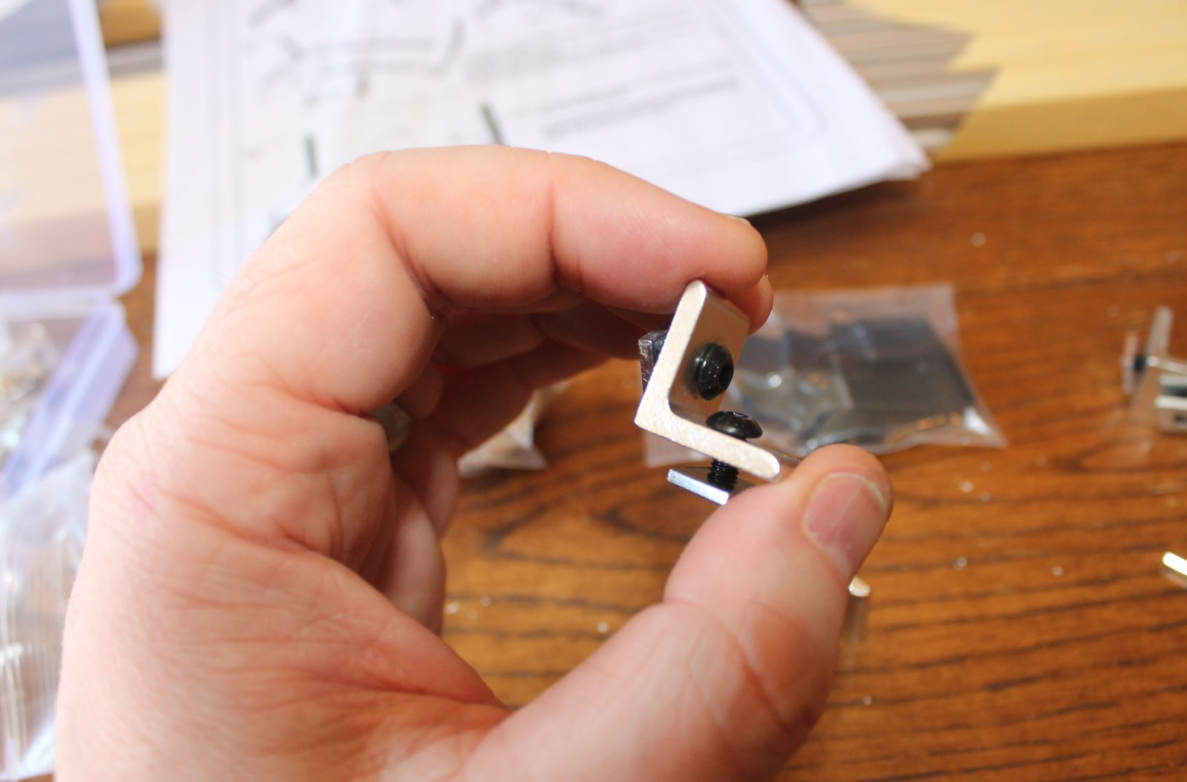
I think I could have done both sides on all of them, but this pictures shows I started with just one side.

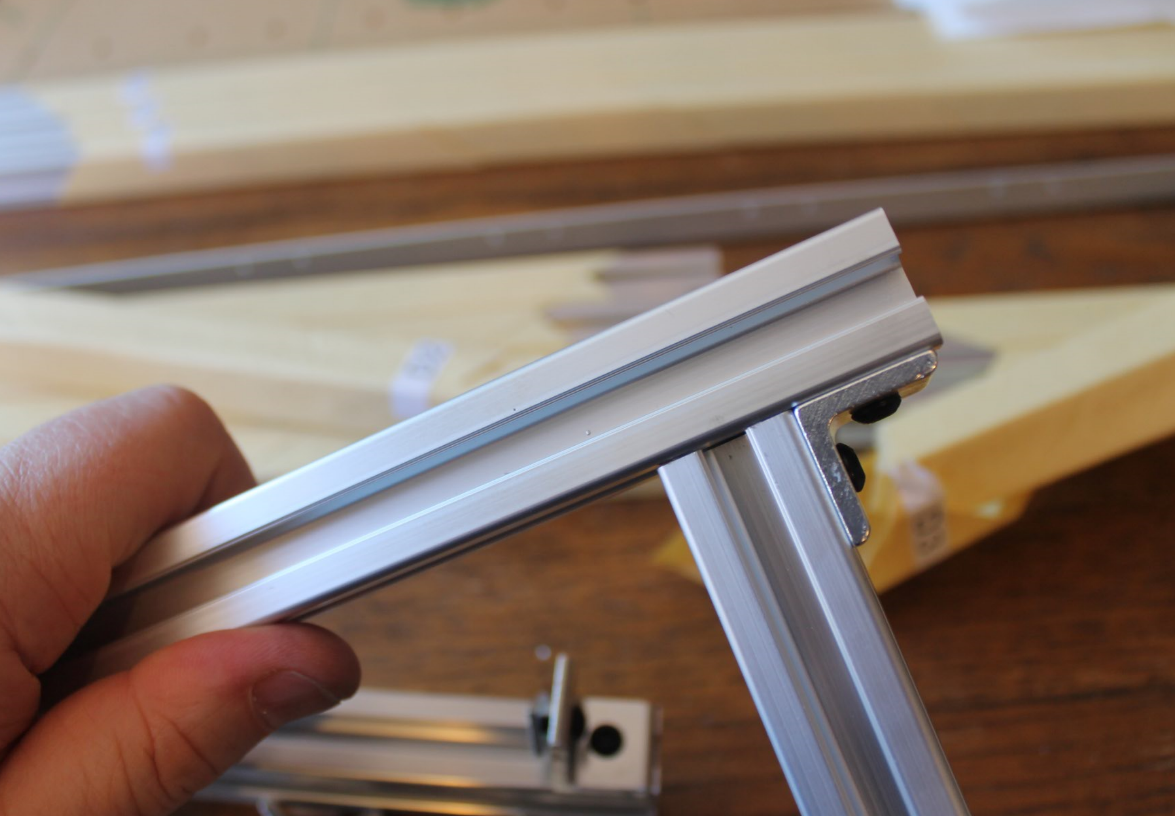
Basically the frame is assembled by slipping the square nut into the grove of the aluminum strut bar. Its a pretty nice setup.
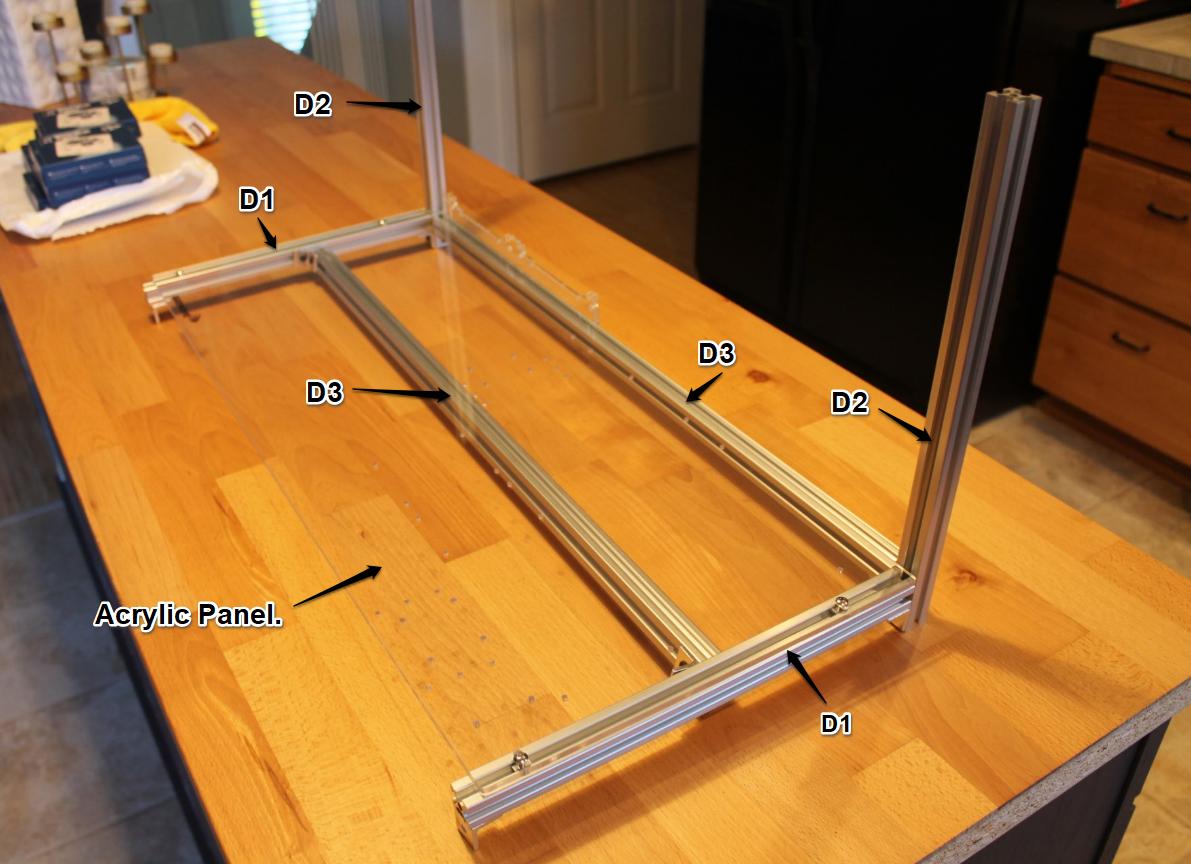
I started by connecting D1 to D2 like below.

Then I added the nuts and bolts to the power supply acrylic piece, and inserted it into one of the D3 bars. Then connected it to the D1-D2 bars I had assembled above.

Next I installed the bottom layer Acrylic panel and the bottom brace. Be sure to position the bottom brace bar D3 between the holes in the acrylic panel so you do not block any holes. At this point I also was not tightening everything 100%. I waited until I was done to do a final tighten on everything. This was so I could easily fit everything together easily, and I was also not sure of the measurement needed between bars. I added the final measurement I used further in the article if you want to use them.
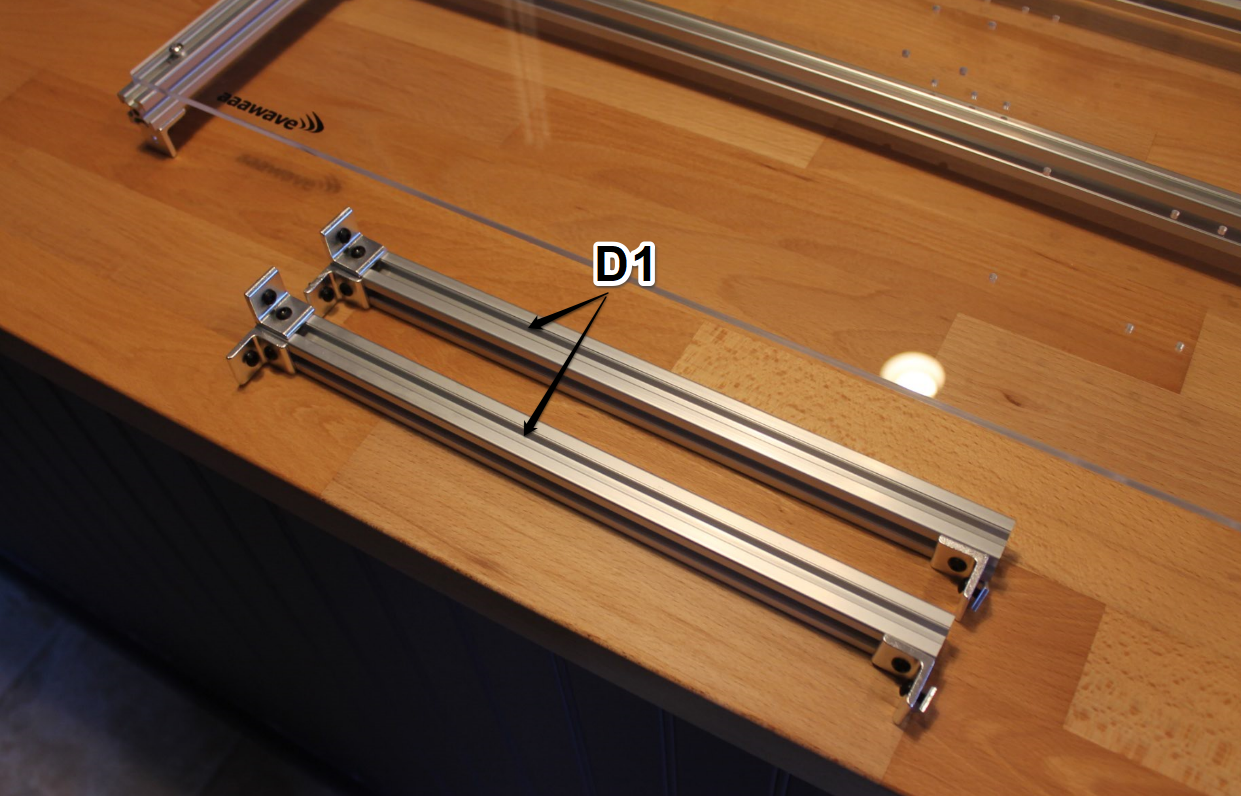
Next I added some more angle brackets onto the D1 bars.
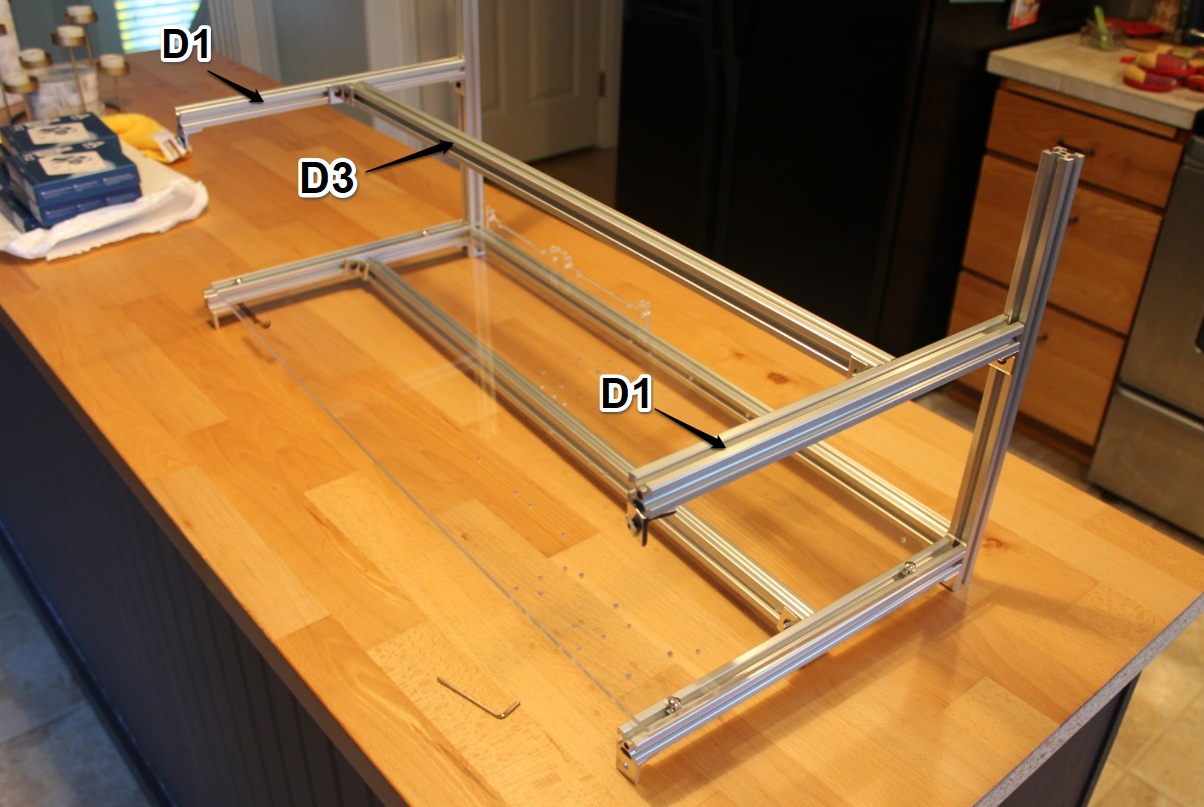
Here I added the new D1 bars above to the frame along with another D3 bar.
Next add the Video card Acrylic and the last two D2 bars and the last D3 bar.
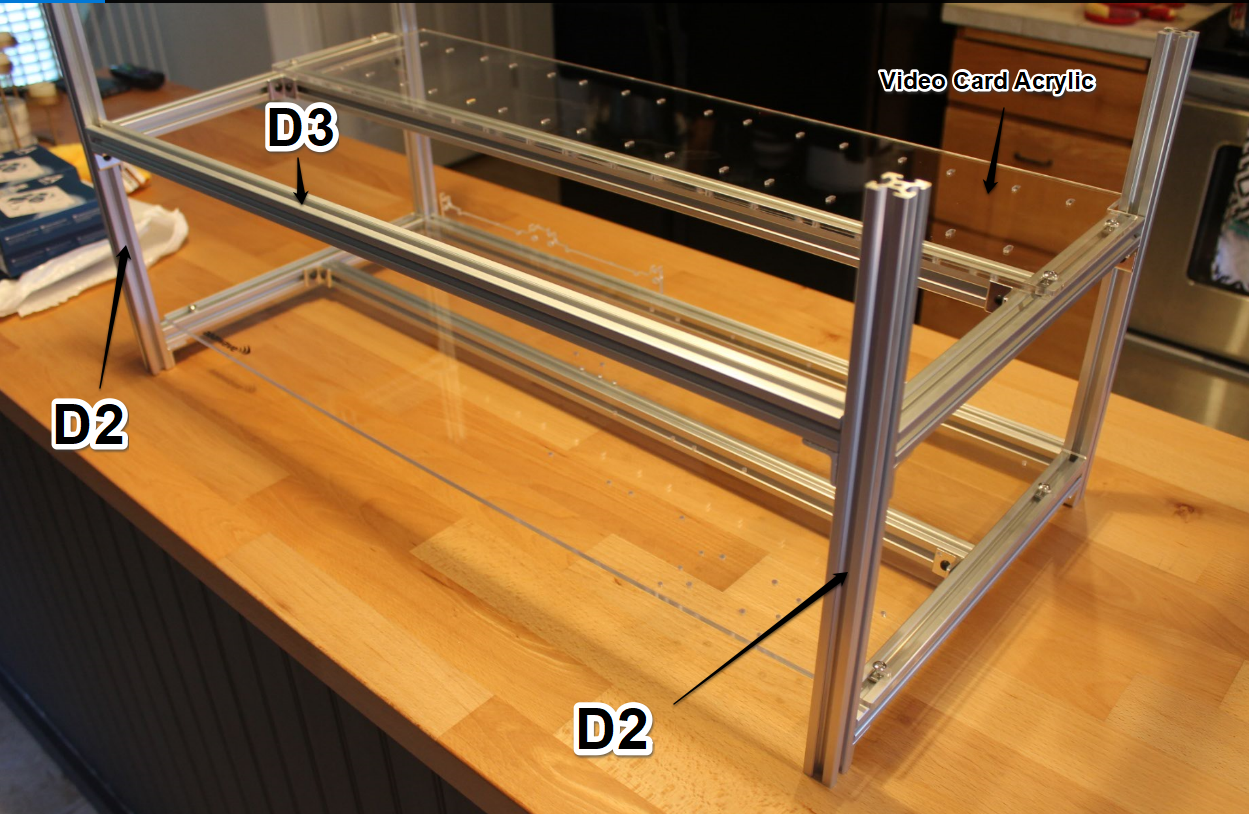
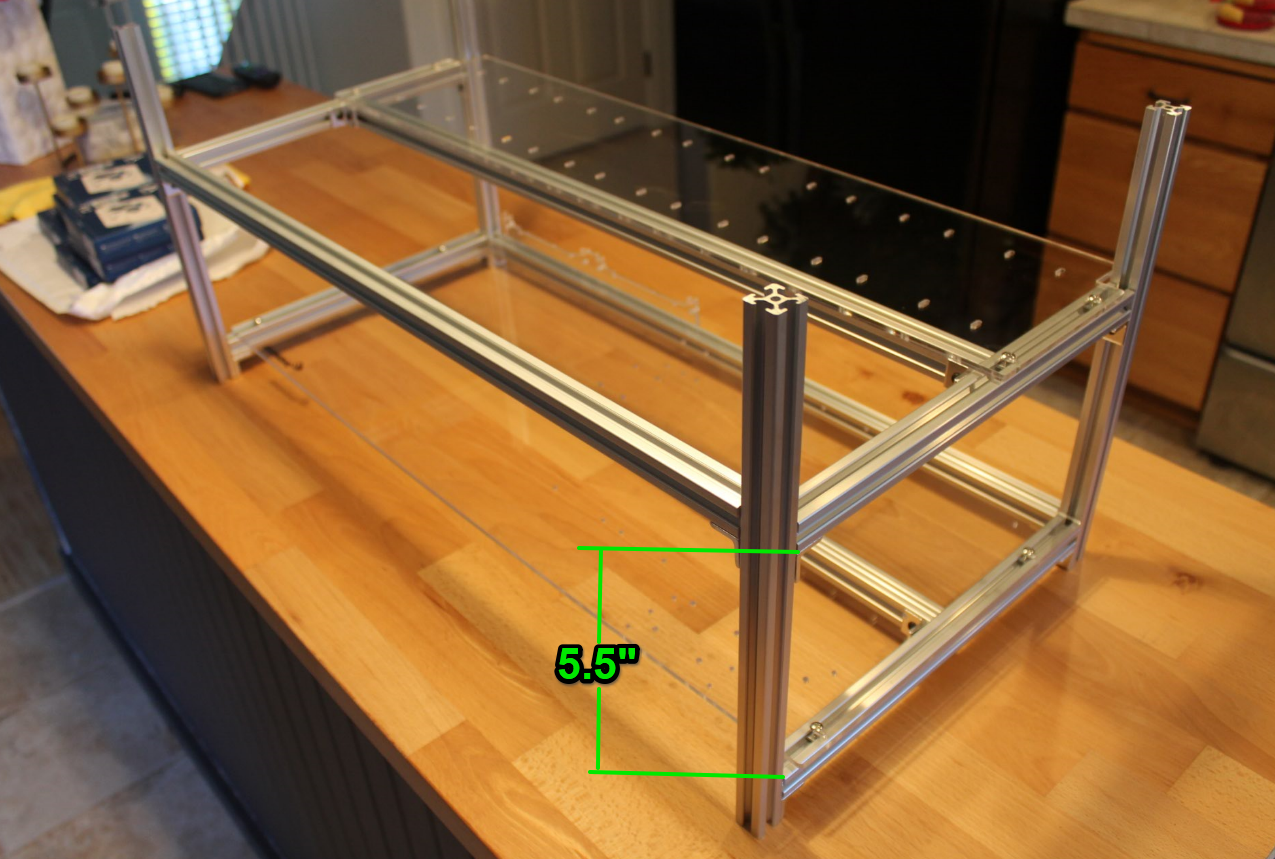
After my assembly I had to make some adjustments, here are my final measurements that may help by being a good starting spot during your assembly. 5.5″ between the bars for the top and bottom layer. The bottom layer bars where just the height of the angle bracket. The Video card acrylic had to be set back about an inch as shown in the picture below.