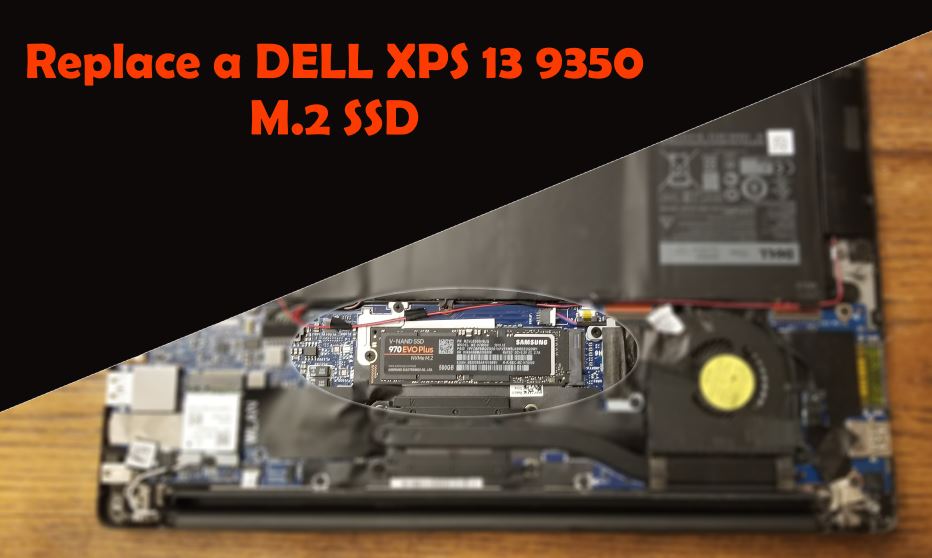
I decided to replace my Dell XPS 13 9350 M.2 SSD drive and was surprised at how easy it was to access the drive under the cover. I guess after opening up cell phones and such it was nice to just have a cover that was screwed onto the back of the laptop and easy to remove.
Disclaimer: This post is for entertainment purposes only, and shows how I replaced my drive. I am not responsible if you try this and void your warranty, injure yourself or damage your property. If you do not know what you are doing please seek a professional.
Types of M.2 SSD drives
To start of I want to mention the Dell XPS 13 uses a M.2 SSD instead of a standard 2.5″ SSD or standard platter hard drive in the laptop. The m.2 SSD is a much smaller drive which makes it well suited for the Dell XPS 9350.
M.2 FORM FACTOR
The Dell XPS 13 9350 uses a 2280 form factor M.2 SSD. This is a very common form factor, but you would want to verify your replacemnt drive matches this. What does 2280 form factor mean? Basically that the SSD drive is 22mm wide by 80mm long. Pretty simple. You can find M.2 drives that range between 16. and 110 mm in length, and 12mm to 30mm wide.
NVMe/PCIe vs SATA
The other option when purchasing a drive is NVMe/PCIe or SATA interface. Basically the NVMe uses PCIe and the advantage is that it will be faster then the SATA model M.2 drives. This is due to PCIe using 4 lanes for data while a SATA drive only uses 1 lane. So a NVMe drive can send more data at once. Since the Dell XPS 13 9350 is capable of using a NVMe drive, I went with that option. One other thing to mention is that NVMe drives also cost more than a SATA drive. So that may play into your decision.
Samsung EVO 970 plus
I chose to buy the Samsung 970 EVO plus as it does state it has the 2280 form factor. Plus they are pretty well known for being reliable drives. It is also an NVMe drive which should be faster then a SATA drive. As for the size, I went with a 500GB model.
Replace the Dell 9350 SSD (M.2)
I was pretty happy with how easy it was to replace the Dell 9350 SSD (M.2) drive. Basically you just need to remove the screws on the back that use a very small torx bit. It was the same one I have used for cell phone repair and a small Philips head screwdriver. The torx screwdriver will be used for all the outside screws on the case with the exception of the screw under the XPS flap. That will use the Philips head. You will also use the Philips screwdriver to remove the M.2 screw holding the drive in place.
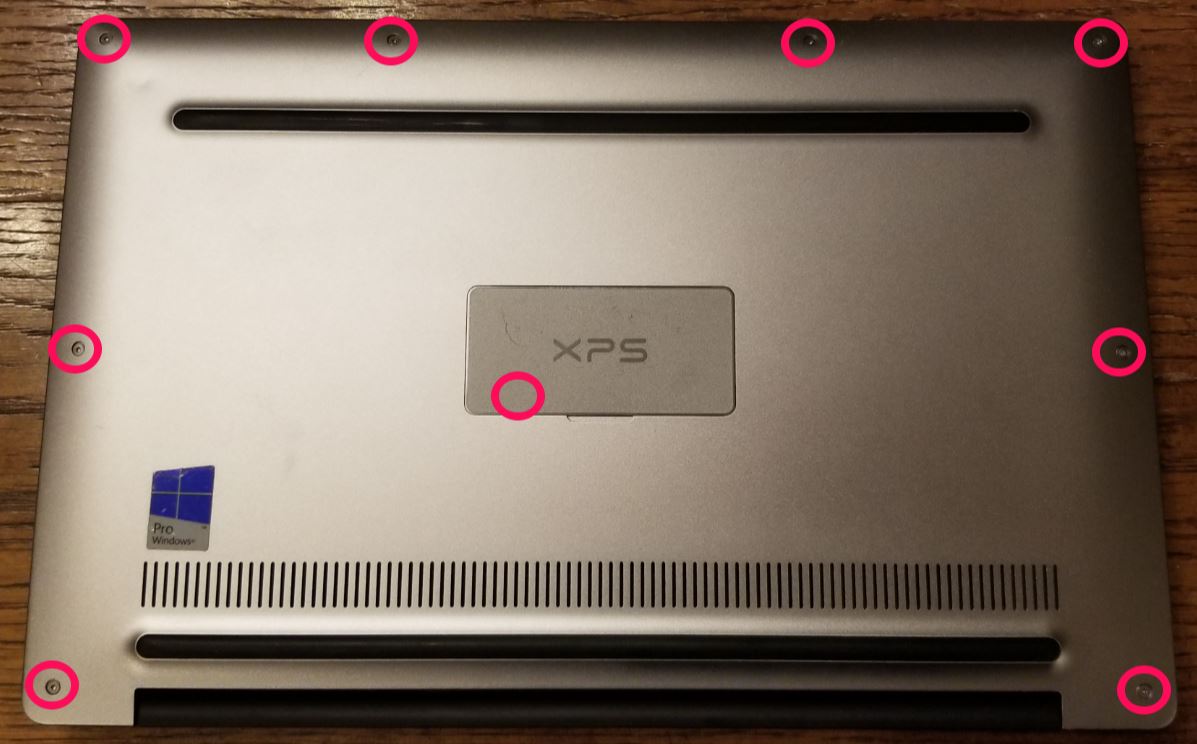
Once the screws were removed I used an old credit card to pry the back away and being careful not stick the card in to far. slowly moving from one side of the laptop to the other side. All in all it was a pretty easy process.
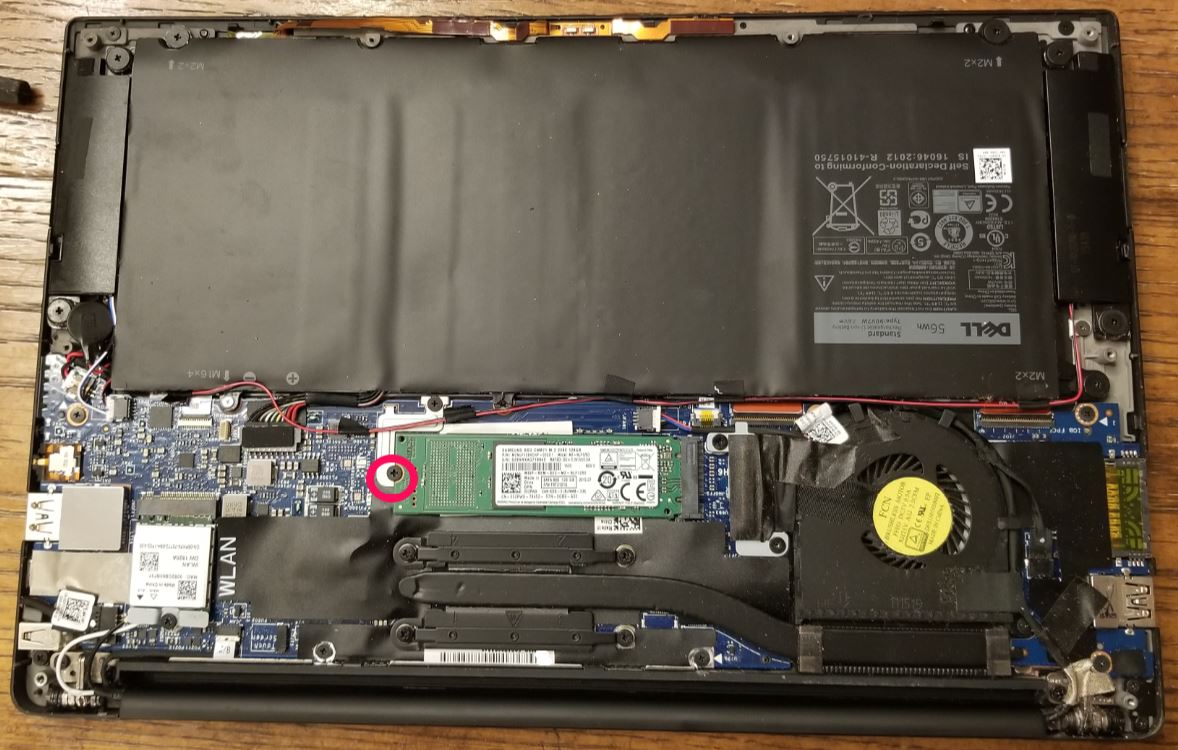
Here is the inside of the Dell XPS 13 9350 and the 128GB M.2 SSD I am going to replace. I highlighted the screw that is holding it in place.
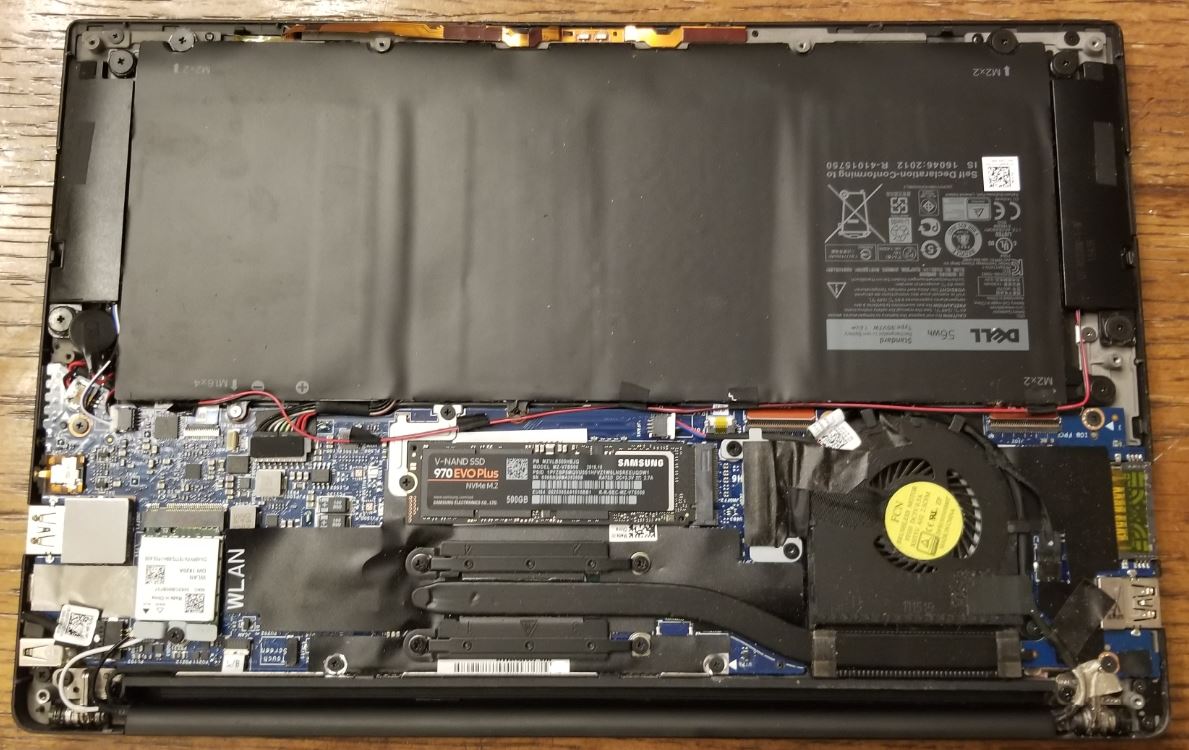
And that is it, I swapped it out with a new Samsung EVO 970 plus 2280 500GB M.2 Drive.
Final steps
Now to just snap the cover back on , replace all the screws I removed and reload windows onto this new drive. To reload windows from scratch I used a Windows media creation USB drive I had previously created. Here is a link to Microsoft for creating a Windows 10 install USB through Microsoft’s Windows media creation tool. When I did this windows re-install my windows was already activated and I did not need to enter a activation code. I think it must be tied to my bios in the Dell XPS 9350.
If you start seeing add in your windows start menu, you can see this post on how to remove them, Here is that link
Hope you found something in this post helpful.