
How to switch to Private network in Windows 10.
I was just installing some camera software on a new pc and noticed that windows firewall appeared to be blocking the program even though I thought I had the ethernet network set as a Private network. Well turns out the wired Ethernet profile settings for this new PC was set to public so it was being blocked. Here are instructions for how to switch to Private network in Windows 10 or switch it to Public as well if needed.
Here are the steps to switch your network settings between Private and Public in Windows 10.
(For reference I am showing screenshots from Windows 10 Version 1903)
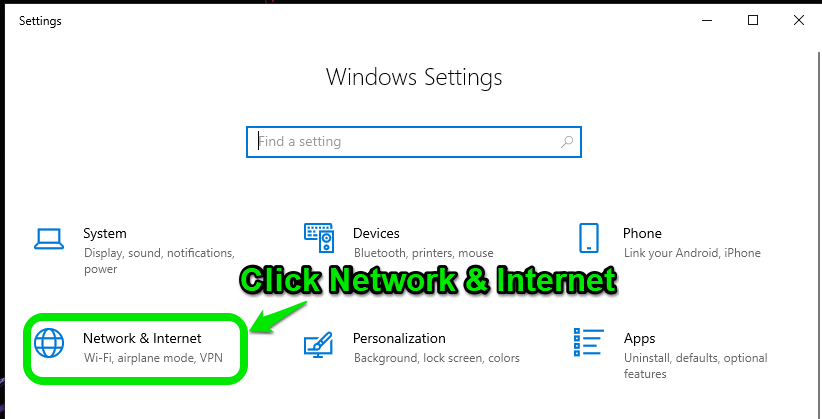
- Basically we need to navigate to the Ethernet settings. You can right click on you network icon in the lower right corner and go directly to “Open Network & Internet Settings” or use the hot key of [WIN+ I] keys to open Windows Settings then click on “Network & Internet“
![]()
OR
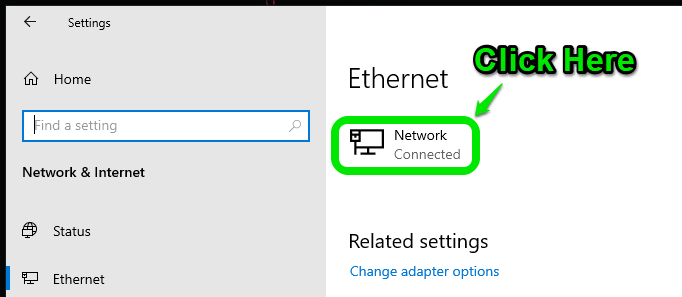
2. Once you get into Network and Internet settings, Choose Ethernet on the left side window. (or Wi-Fi if your changing a Wi-Fi network)

3. The next step is to click on your network in the middle window. See the picture below. I thought this could have been designed a little better to let you know clicking it is an option. But you will see it highlight when you hover over it.
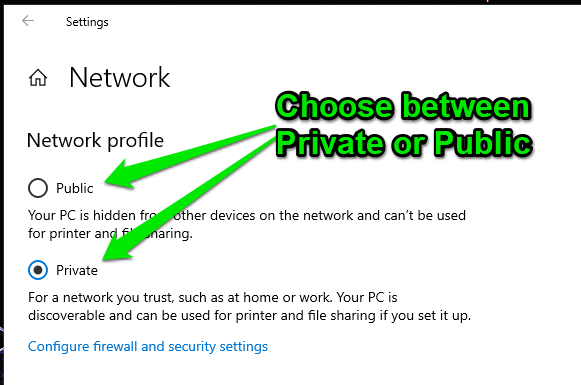
4. That’s it, you are now on the screen where you can toggle between having your network be Private or Public.
SUMMARY
That’s it, now you can set your network Profile how you like it. While I was changing my profile for a wired Ethernet network in this post, if you are trying to change it for Wi-Fi and having issues you can also see the Microsoft instructions on their site HERE.
Here are my 5 tips on how to speed up your Windows 10 PC. LINK
