I just wanted to do a quick post on my Sapphire Nitro+ RX570 8GB and how I just did some optimization on it for mining the Cryptonight Heavy Algorithm. If you are not familiar with Cryptonight Heavy (CNH), it is a new algorithm that is Asic resistant and used on a few cryptocurrencies such as Sumokoin and Loki. This is how I increased the hashrate while lowering the power.
Some background information. My RX570 is in my main Desktop PC not a mining rig. It is the only GPU in the PC, and I tend to use it for mining when it is not being used for anything else. I figure I might as well keep it working and let it pay for itself. I had downloaded a BIOS and flashed it onto the card a while ago, and while it did show me good rates in the mining programs I used, If you looked a little deeper you would see it was taking a lot of errors and the hash rate on the pool was not what was being shown on the card. Then I checked the program and saw I was losing a lot of hashrate due to errors. I lived with it for a bit as it was still productive, but thought it was time to really optimize the card and get some more hash rate while also lowering the power being used by it. ( It was a nice heater in the winter, but with summer coming, I need less heat in the room 🙂 )
The first thing I did was flash it back to the original BIOS. So with the card back to normal I was ready to begin.
I almost forgot my disclaimer.
Disclaimer: All content provided on this blog is for informational purposes only. The owner of this blog makes no representations as to the correctness or completeness of any information on this site or found by following any link on this site. The owner will not be liable for any errors or omissions in this information nor for the availability of this information. The owner will not be liable for any losses, injuries, or damages from the display or use of this information.
Ok, now that that’s been done.. lets continue.
My RX570 uses Hynix Memory. With the stock settings I was seeing the following Hashrates on it for Cryptonight Heavy with no errors.
Stock BIOS using XMR-Stak on CNH = ~700 Hs
Since I am back to stock settings on the card. Now I needed a new BIOS that can improve that HashRate, but I wanted something better then the one I had found on the internet that would cause errors. I still had my original BIOS on my PC that I had pulled form the video card, so thought I would modify it with Polaris 1.6.7. One thing I liked about this was that it would only change the memory straps and not the power settings. I could adjust that myself as needed. I could also fine tune it to what my card can handle. Plus how much easier can you get, its “One Click”.
NOTE: I think I originally pulled the BIOS off the card using GPU-z and then I had reflashed to put the original BIOS back on the card before starting today using ATIWinflash.
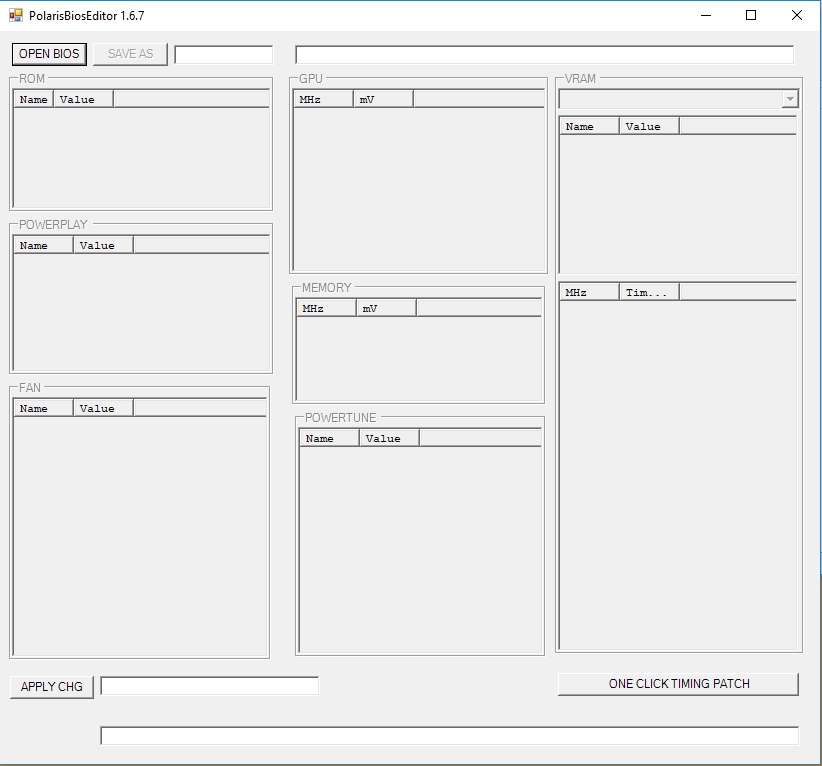
So to get my new BIOS ready I started by loading up Polaris 1.6.7.
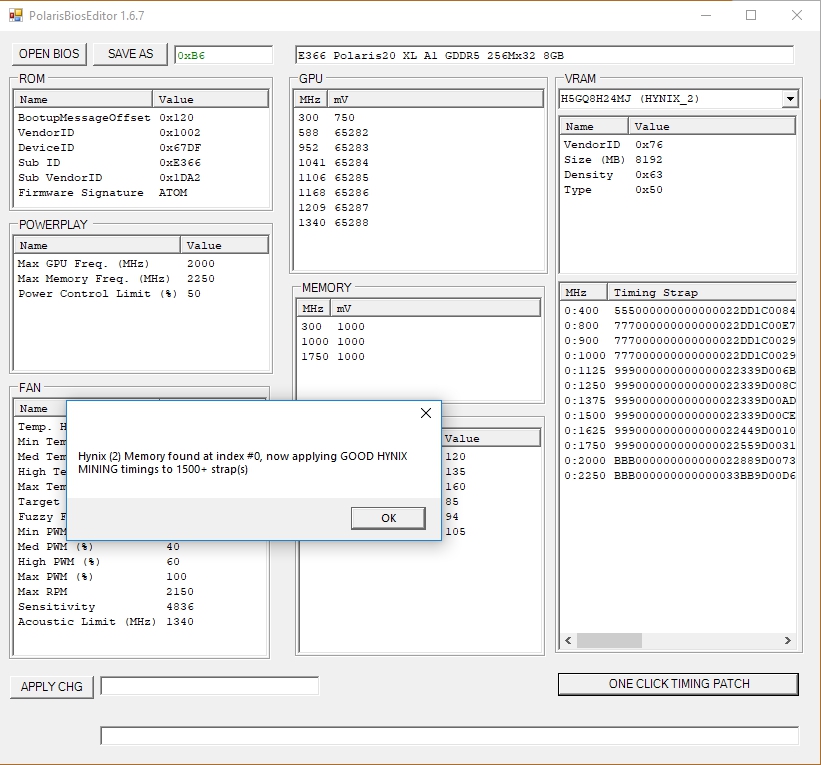
Once Polaris 1.6.7 loaded I opened up my original BIOS.
Then I clicked “ONE CLICK TIMING PATCH.” You can see it noted I had Hynix Memory and applied new straps.
So I saved the new custom BIOS into a folder and was ready to put it onto the card.
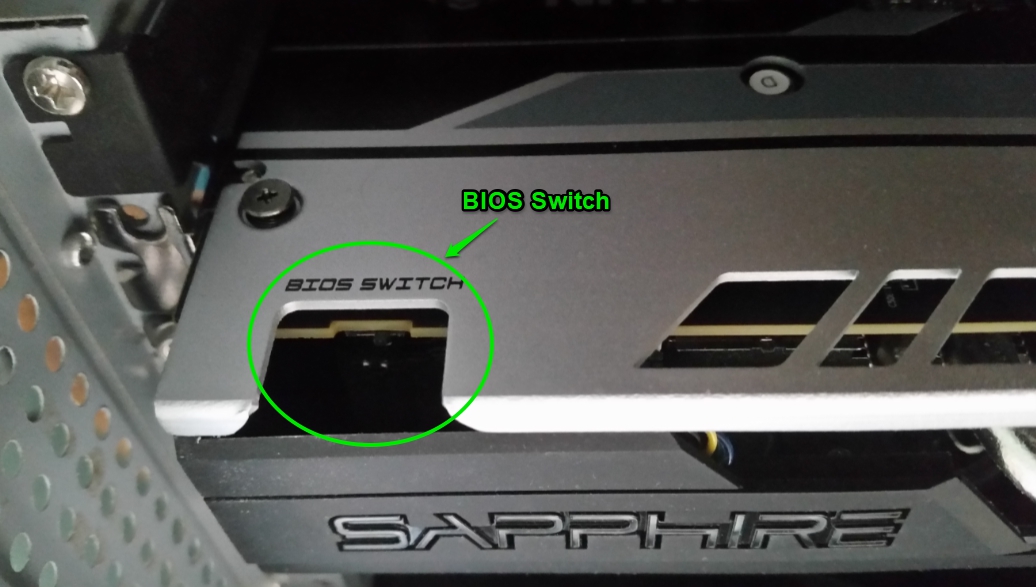
One interesting thing about the Sapphire Nitro+ RX570 card is the BIOS switch. I had not played around with this before, but decided to turn off the computer and flip the switch and put my new bios on this other position. My understanding is you can keep two separate bios’s on this card. So I flipped the switch and got ready to load my new bios I just created above.
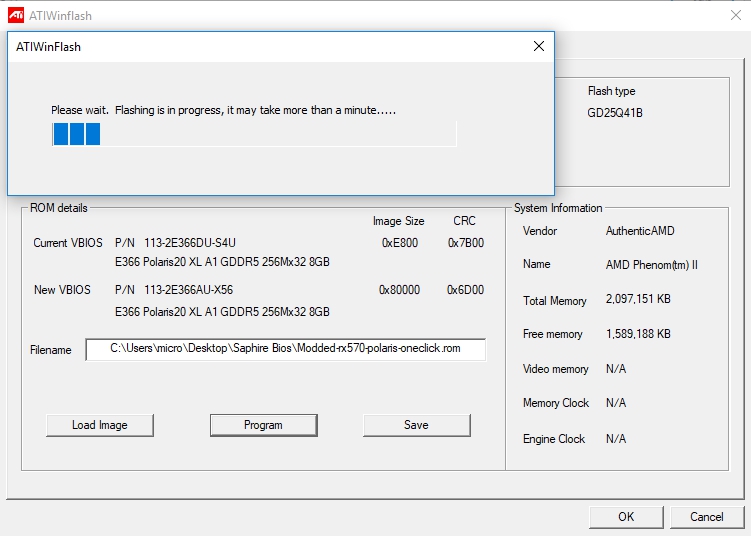
To put the new BIOS on the card I loaded up ATIWinflash. And picked Load Image. .. .. and loaded my new BIOS.
Next I chose program to flash the card. This made me think how nice it was to have two BIOS’s on the card in case I messed something up.
It completed successfully, no drama.
Ok, I got my fancy new BIOS… How are my stats now.
| Dual Thread | CNH H/S | |
| RX570 – Stock BIOS | 600/600 | ~709 |
| RX570 One click bios mod | 600/600 | ~667 |
UGGGG.. they are WORSE!!!.. 🙂 No worries.. I was not done… Now comes the fun part.
With the card and its new BIOS, Now I was ready to start changing the CPU and Memory settings (and balance those increases with a reduction in power). This can be a little time consuming as you want to increase the Memory frequency, decrease the power and also watch for errors. Here is how I started the process.
First I loaded up HWinfo64. You can find this program free online from the HWinfo website. I used this to monitor for errors as I was changing the settings.
When you open it up chose sensors and you can see the memory errors when you scroll down. This is the main thing you what you want to keep an eye on as you change settings.
Next I loaded up the OverdriveNtool to change my Memory and GPU and power settings.
I started out with some common settings and worked my way up to the optimal settings. I disabled the P0 – P6 on the GPU and the P0-P1 on the Memory by double clicking them. As a starting point I set the GPU to 1150MHZ and 850mV. The Memory to 1750MHz and 900mV. It looked like this.
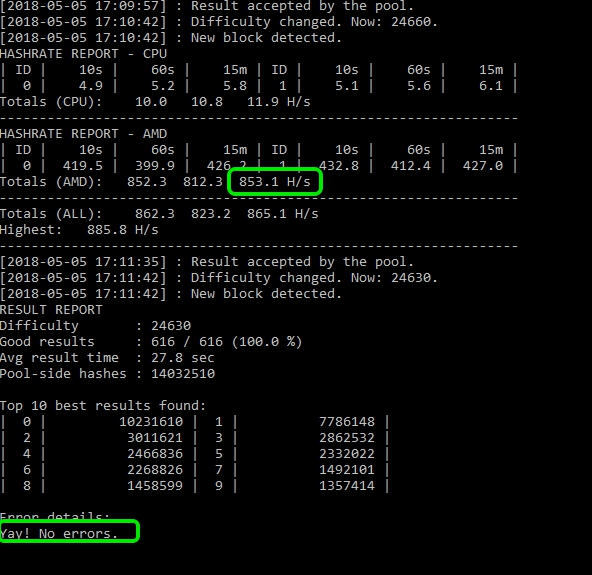
I applied the changes and then would start up the mining program and check my hashrate and monitor both XMR-Stak 2.4.3 for errors by hitting “r” and the hashrate by hitting “h” . I would also watch HWinfo for accumulating errors.
I left the GPU settings at 1150/850 as they are not as critical as the memory for increasing hashrate.
So I would run it for about 15 minutes, then bump it up +100Mhz on the memory if it did not have errors.
Here is an example of the process… In this picture I was at 1850MHz on the memory. No errors in HWinfo or in XMR-Stak
I ended up getting to 2175 MHz on the memory, and I do see about an error every 5 – 15 seconds with CNH running. I thought about rolling it back a little, But it does not seem to be enough to affect the XMR-STAK program as it consistently comes back with no errors. I feel this is my limit on the memory overclock and will leave it alone for now. I was also able to drop down my GPU MHz to 1100,850mV. This should help out on power usage. Here are the settings I am currently at.
Now it was tie to fine tune the XMR-Stak settings. Basically I seem to have better luck with Dual threads, (You can run it at a single thread or Dual thread by changing the configuration in the amd.txt file in your xmr-stak folder.
So I started by adjusting the intensity up for both threads. I started at 600 for both threads, and slowly worked up about 50-100 at a time. But once I got to 820 it seemed to drop my hash rates. I ended up stopping at 790 for now on both threads as that was my best result.
| DT 640 | DT 720 | DT 760 | DT 780 | DT 790 | DT 820 |
| 750 | 803 H/s | 821 H/s | 828 H/s | 853 H/s | 701 H/s |
Here are what my config looks like for Dual Thread.
"gpu_threads_conf" : [
 // gpu: Ellesmere memory:3920
 // compute units: 32
 { "index" : 0,
 "intensity" : 790, "worksize" : 8,
 "affine_to_cpu" : false, "strided_index" : 1, "mem_chunk" : 2,
 "comp_mode" : true
 },
 { "index" : 0,
 "intensity" : 790, "worksize" : 8,
 "affine_to_cpu" : false, "strided_index" : 1, "mem_chunk" : 2,
 "comp_mode" : true
 },
],
With these settings I am seeing around 850H/s :-). This is great and I am pretty happy with this card.
SUMMARY:
While I was able to get the card to 850H/s , that was not the only upside so far. It is using less power then it was before and is running much cooler. Now its running at a peak of about 44C. It was hitting over 60C before. I still plan to do some more power adjustments, I just did not have my power meter hooked up to my desktop at the time. I will update the post with that info once I get it. But I can already tell, its not using as much power by the room being cooler. Plus its getting 100H/s over what I had before as I am no longer getting errors in XMR-Stak. So far so good. For bang for you buck on mining Cryptonight Heavy, its hard to beat AMD. I wish I had a AMD Vega to play with as I hear they are really good with CNH. Hope I didn’t omit to much and you find something in this helpful.
Here is the Sapphire Nitro+ RX570 on amazon if you want to check it out and read the reviews. Its a great card and for the price I am really happy. I am not sure how the warranty action will be if I have an issue, but so far its been running great.
On a side note. I was also testing Dual Eth/Decred mining at the same time, but interestingly I would see a lot of errors with Eth/Dec at these settings. So If I switch back, I would need to fine tune it for Eth/Dec. I ended up saving this profile in OverdriveNTool as just for Cryptonight Heavy.
[UPDATE 5/12/18] Had a weird issue in which I was seeing a reduced hash rate all of a sudden. Was running in the 600H/s range. I tried reapplying pixel patcher, playing around with my settings and could not figure out the problem. Then I checked and it looks like windows had recently done an update. (Actually 3 updates- a flash update , a security update KB4103727, and some other windows update KB4131372. So I started by uninstalling the security update( KB4103727) and my PC restarted. Now my hashrates are back to normal. I also now see a new security update was done right after my reboot with todays date, but it has a different number. (KB4093112).
FWIW – I just took a snapshot to show how it looks now. And it shows the new update the that was installed after uninstalling KB4103727.
I thought about disabling windows update on this desktop, like I do with my mining rig, but decided to hold off on that for now. But I did go ahead and pause the updates for 35 days, and will see if others have issues.
Anyway back to the mid 850 H/s range so feeling good again.

